Should the Window Apron Be the Exact Same Width as the Side Casing?
Deciding whether the window apron should be the exact same width as the side casing is a common dilemma for homeowners and DIY enthusiasts alike. Achieving a balanced look around your windows requires understanding how these trim elements interact with one another. If you have ever wondered if the window apron should be the exact same width as the side casing, the short answer is no, it is rarely required and often aesthetically undesirable.
Most professional carpenters prefer the apron to align perfectly with the outer edges of the side casing to create a cohesive frame. This article provides the technical details you need to ensure your window installation looks polished and intentional.
The Standard Design Rule for Window Aprons
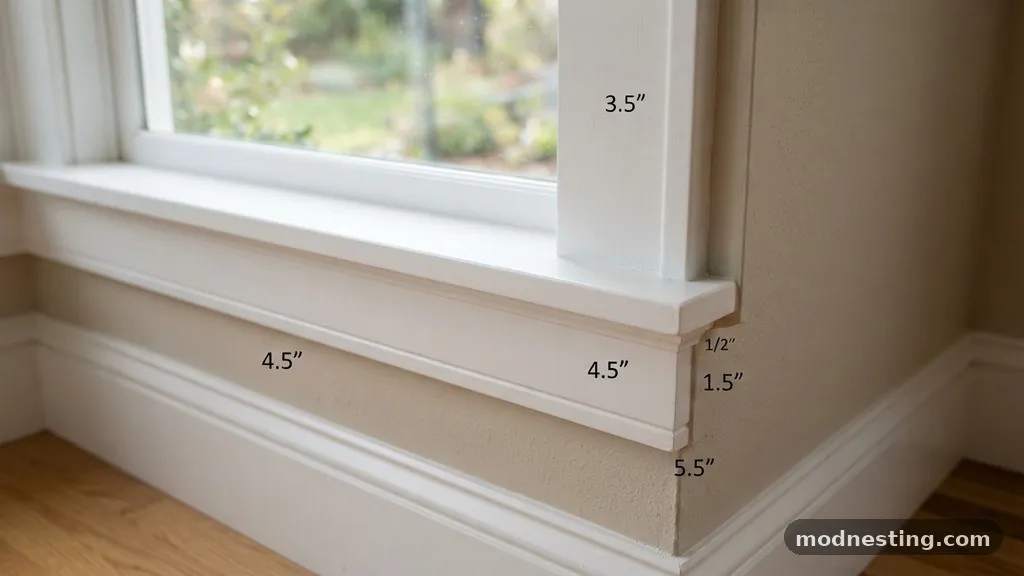
In traditional carpentry, the window apron acts as a structural and decorative transition piece beneath the stool. While there is no rigid building code mandating a specific width, the industry standard is to have the apron align flush with the outer edges of the side casings. This alignment creates a visual “base” for the window, making the entire assembly appear as one unified unit.
If the apron is narrower than the casing, the window can look top-heavy or incomplete. Conversely, if it is significantly wider, it may clash with the surrounding wall proportions.
Most professionals aim for a look where the apron width matches the distance between the outer edges of the two vertical side casings. This creates a clean, perpendicular line that grounds the window stool. When the vertical casing runs straight down to the wall, the apron bridges the gap beneath the stool to provide a finished appearance.
By keeping these widths consistent, you maintain a sense of symmetry that is pleasing to the human eye. This practice is standard in colonial, craftsman, and modern farmhouse design styles.
Why Alignment Matters for Visual Balance
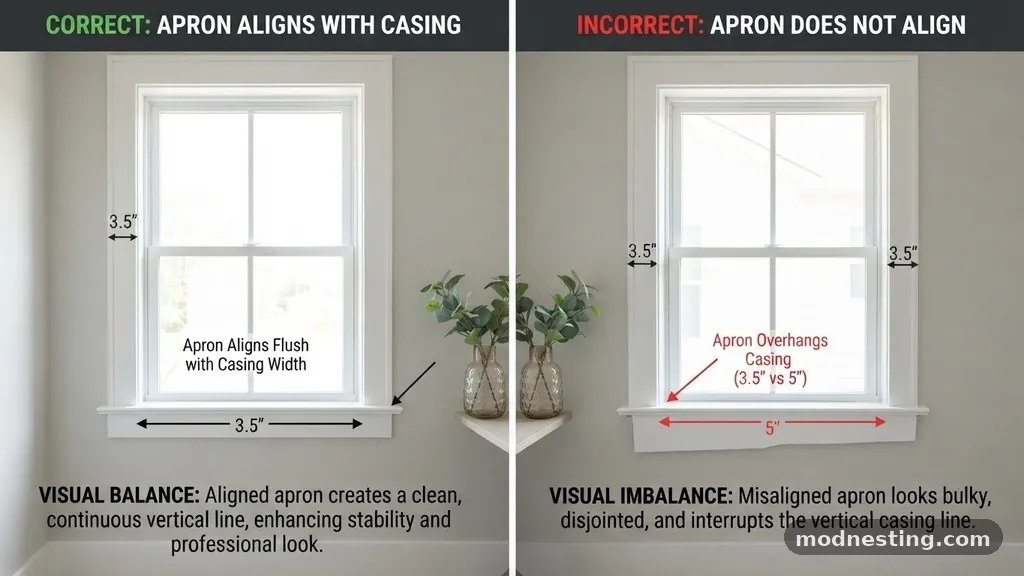
Visual weight is a critical factor in interior design, especially when dealing with millwork. When you ask if the window apron should be the exact same width as the side casing, you are really asking how to achieve visual stability. A window frame that lacks a consistent horizontal anchor often looks like an afterthought.
By aligning the apron with the outer edges of the casing, you create a visual frame that mirrors the rectangular nature of the window itself. This consistency prevents the eye from being distracted by uneven lines or disjointed trim.
Consider the role of the reveal in your trim installation. A reveal is the small portion of the window jamb that remains visible between the sash and the casing. If your casing is set back from the edge of the jamb to create a reveal, your apron should generally respect that same alignment.
If the apron is too short, the window appears to float on the wall rather than being anchored to it. If it is too long, it can interfere with adjacent baseboards or corner trim. Maintaining the same width as the outer casing edge is the safest path to a professional result.
Anatomy of a Window Trim Assembly
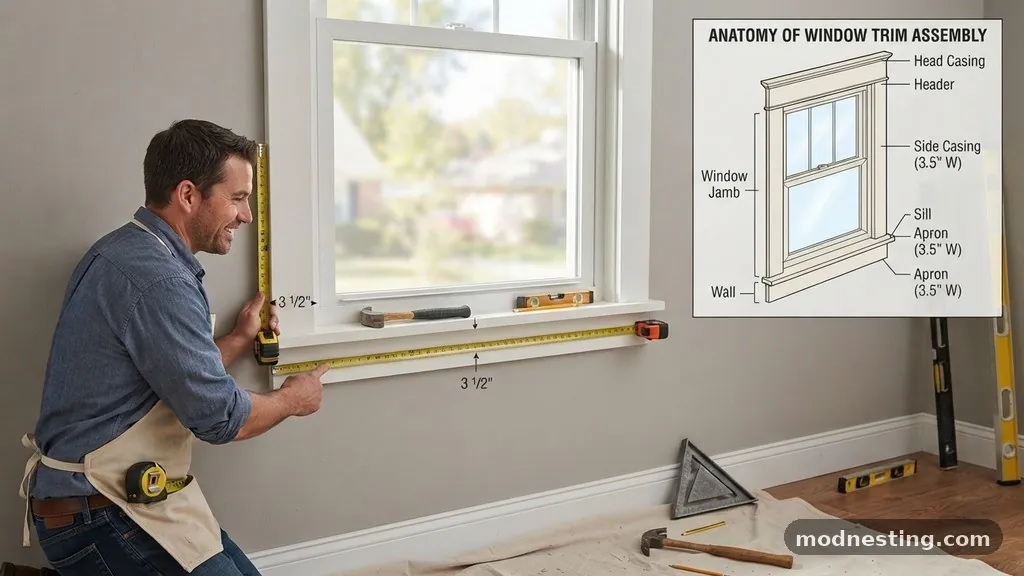
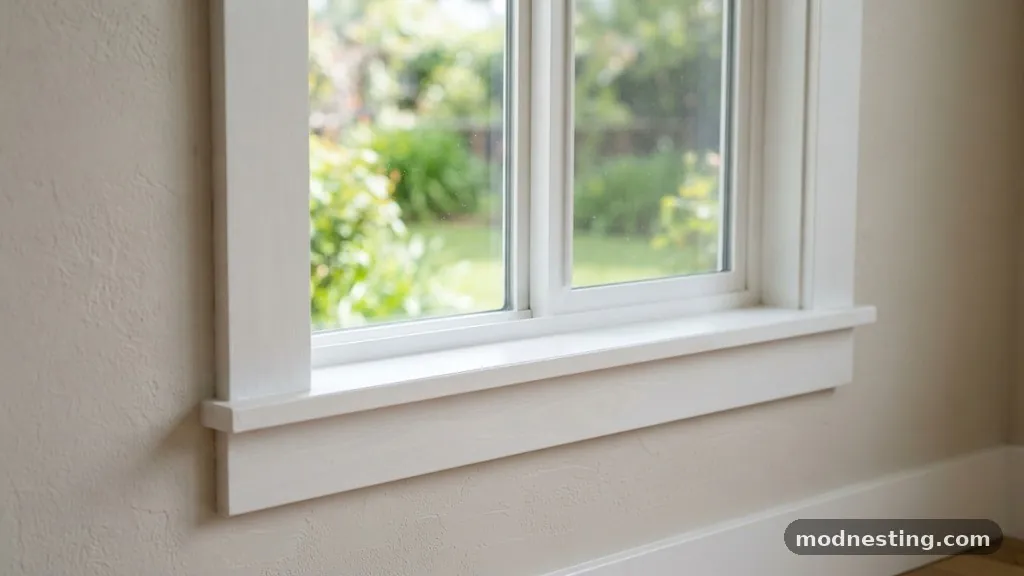
To understand the relationship between these parts, it helps to break down the individual components. The stool is the horizontal shelf at the bottom of the window interior. The apron is the flat piece of molding installed directly beneath the stool to support it and hide the gap between the stool and the drywall.
The side casings are the vertical boards that frame the left and right sides of the window. Each of these parts must function together to create a weather-tight and aesthetically pleasing seal.
Component Breakdown
- Stool: The horizontal ledge that projects into the room.
- Apron: The support trim that sits directly under the stool.
- Side Casing: The vertical trim that frames the sides of the window.
- Backband: An optional decorative strip added to the outer edge of the casing for extra depth.
When you measure for your apron, you must measure from the outer edge of the left casing to the outer edge of the right casing. This ensures the apron spans the entire width of the vertical trim. If you are using a backband, remember that the backband adds extra width to the casing.
You must account for this extra thickness when cutting your apron to length. Failing to include the backband in your measurements will result in an apron that looks too narrow.
Comparing Trim Width Strategies
Choosing the right width often depends on the specific architectural style of your home. Some styles favor a wider apron that extends past the casing, while others demand a precise flush fit.
It is helpful to compare these common approaches to see which fits your project goals. You can find detailed technical guidance on these standards through resources like the National Park Service technical preservation briefs regarding historic window treatments.
| Strategy | Visual Effect | Difficulty |
|---|---|---|
| Flush with Outer Edge | Balanced, clean, traditional | Moderate |
| Extended Apron | Decorative, heavy, formal | High |
| Inset/Narrower | Modern, minimalist, sparse | Low |
The flush approach is the most common for residential renovations. It requires precision cutting, but the result is a seamless look that integrates well with baseboards. The extended apron is often found in historic Victorian homes where ornate details are preferred.
An inset or narrower apron is rarely used because it often leaves awkward gaps that are difficult to caulk and paint. Always test your cuts on scrap wood before committing to your final trim pieces.
Handling Backbands and Decorative Moldings
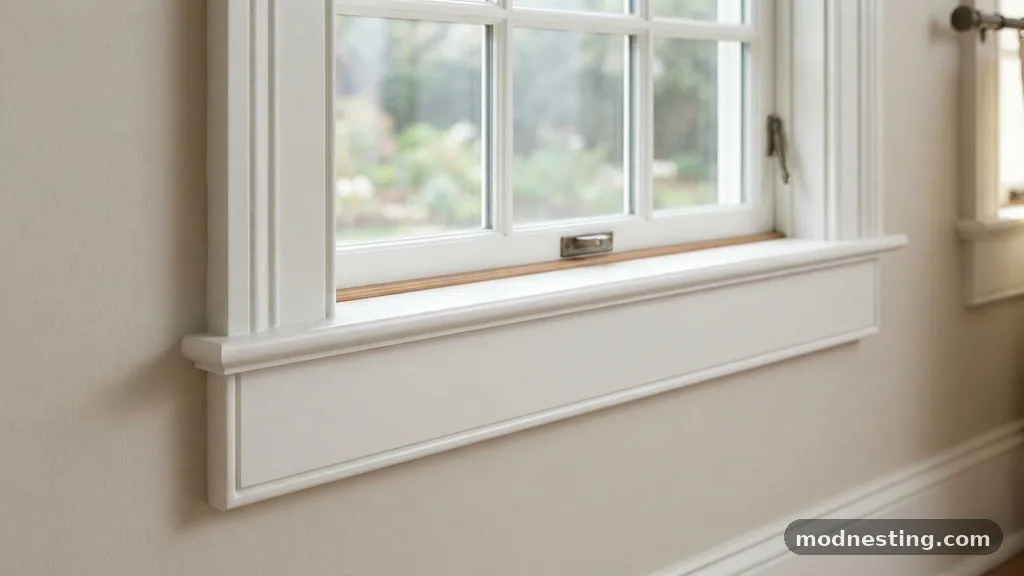
If you decide to upgrade your window style with a backband, your installation process changes slightly. A backband is a secondary piece of molding attached to the outer edge of the main casing. Because it adds volume, it creates a more substantial and expensive look.
However, it also changes the total width of your vertical trim. If you ignore this, your apron will look undersized and puny.
When measuring for an apron with a backband, you must treat the outer edge of the backband as your primary boundary. This means your total width calculation will increase by twice the thickness of the backband. This is a common mistake for beginners who measure only the primary casing board.
Always dry-fit your components before applying construction adhesive or nails. This allows you to check the alignment from all angles and make minor adjustments to the length of the apron.
The Impact of Window Stool Projections
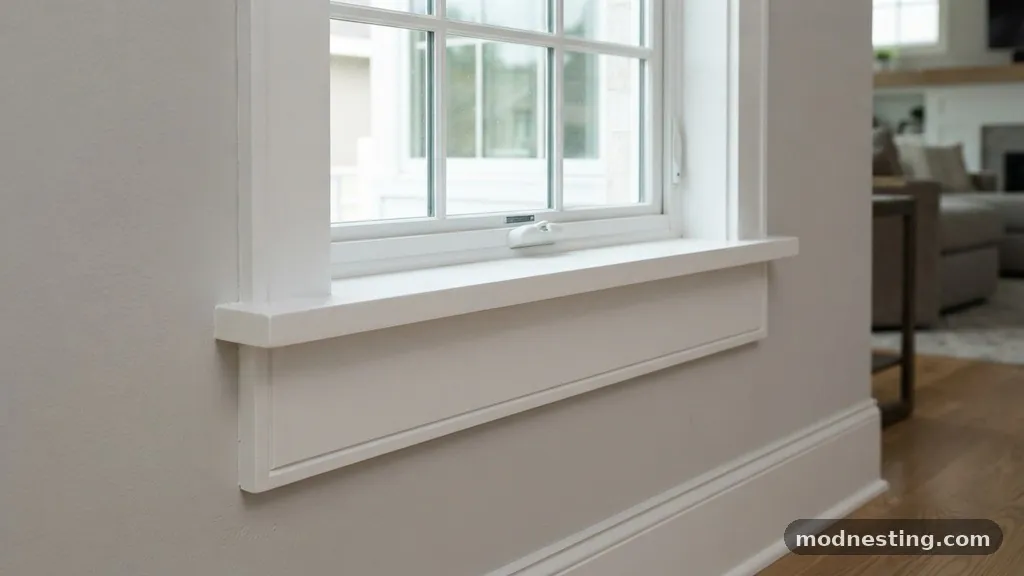
The stool is the horizontal board that serves as the sill on the interior of the window. It usually projects beyond the side casings by a small amount, often between half an inch and one inch. This creates a “horn” that acts as a decorative end cap for the sill.
Your apron should not extend as far as these horns. Instead, the apron should sit directly underneath the main body of the stool, aligned with the outer edges of the side casings.
If your stool has very deep horns, you might be tempted to extend the apron to match. This is generally discouraged because it creates a cluttered look at the base of the window. The apron is designed to support the stool, not to mimic its decorative overhang.
Keep the apron width confined to the width of the casing assembly for the cleanest look. This keeps the focus on the window as a whole rather than on individual trim pieces.
Installation Tips for a Professional Finish
Achieving a professional finish requires more than just cutting the right lengths. You must also ensure that the joints are tight and the surface is prepared correctly. Use a high-quality wood glue on the mitered ends of your casings to ensure they do not separate over time.
When installing the apron, use a level to verify that it is perfectly horizontal. A slightly crooked apron will be immediately noticeable, even if it is the perfect width.
Use finish nails to secure the apron into the wall studs or the window framing. If you are working with hardwood, pre-drill your holes to prevent the wood from splitting. Once the trim is installed, fill all nail holes with a paintable wood filler.
Sand the area until it is smooth to the touch before applying your primer and paint. Taking these extra steps ensures your trim looks like it was installed by a master carpenter.
Common Mistakes to Avoid
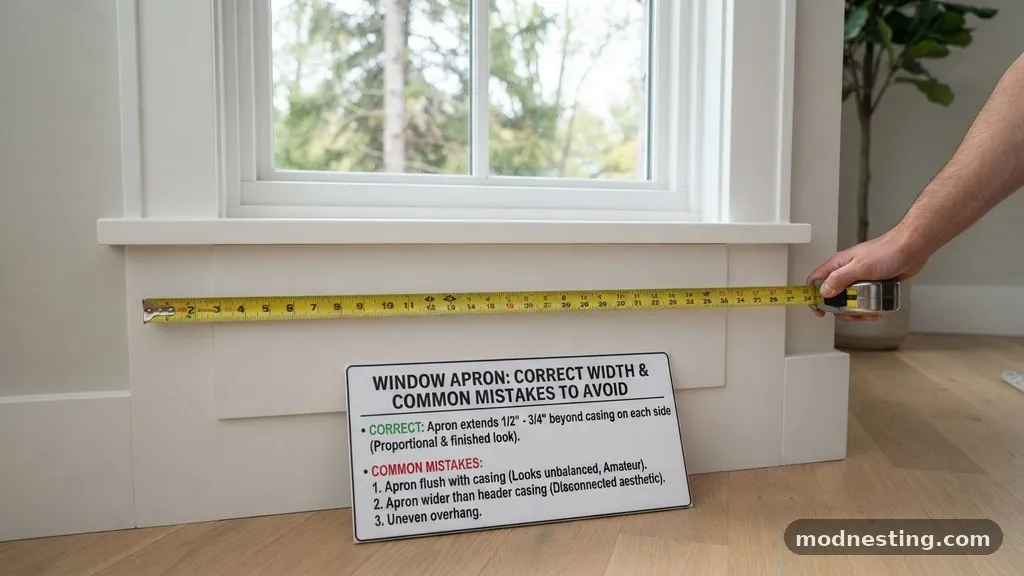
Many DIYers struggle with the transition between the apron and the baseboard. If your apron sits directly on top of the baseboard, you might have a conflict in thickness. This is known as a “butting” issue.
To avoid this, some installers opt to stop the baseboard at the casing and return it into the wall. Alternatively, you can use a slightly thinner apron that matches the profile of your casing.
Another common mistake is failing to account for wall irregularities. Walls are rarely perfectly plumb, meaning your side casings might not be perfectly vertical. If you measure the width at the bottom of the casing, it might be different than the width at the top.
Always measure the width at the exact location where the apron will be installed. This ensures a tight fit that requires less caulk and looks much more professional.
Selecting the Right Materials
The material you choose for your window trim will significantly impact how it behaves over time. Pine is a popular choice for painted trim, while oak or poplar is better if you plan to stain the wood.
Regardless of the species, ensure that the wood is properly kiln-dried. Wet or green wood will shrink as it dries, leading to ugly gaps in your mitered joints.
If you are working in a humid environment, consider using PVC or composite trim. These materials do not expand or contract with moisture, making them ideal for bathrooms or kitchens. They are also much easier to cut and install for beginners.
However, they do not accept stain, so they are best suited for painted applications. Always choose materials that match the rest of the trim in your home to keep the aesthetic consistent.
FAQ
Does the apron have to be the exact same thickness as the casing?
It is highly recommended that the apron and the casing have the same thickness. If the apron is significantly thicker or thinner than the casing, the transition at the corner will look awkward and unfinished. Using matching stock for all your trim pieces is the best way to ensure they look like they belong together.
What if my window stool is wider than the casing?
This is actually the desired look for most traditional window installations. The stool should extend past the casing on both sides to provide a finished “ear” or horn. Your apron should still align with the outer edge of the casing, not the edge of the stool. This creates a balanced, professional appearance.
Can I install an apron without a window stool?
Technically, you can, but it is not recommended for a finished interior. The stool acts as a necessary transition piece that covers the rough sill of the window frame. Installing an apron directly against the bottom of a window frame without a stool will look incomplete and lack the necessary structural support for the trim.
How do I hide the gap between the apron and the drywall?
The best way to address small gaps is with a high-quality paintable caulk. Apply a thin bead of caulk along the top and sides of the apron where it meets the wall. Use a damp rag to smooth the bead immediately after application. If the gap is large, you may need to use a scribe tool to trace the wall profile onto the wood before cutting it to fit perfectly.
Is it okay to use a different trim style for the apron?
While you can technically use a different style, it is usually better to keep the trim profiles consistent. Using a similar molding style for the casing and the apron ensures a cohesive look throughout the room. Mixing styles can make a home look disjointed and poorly planned.
Conclusion
Deciding whether the window apron should be the exact same width as the side casing is a matter of achieving proper visual alignment. While no law dictates this, matching the apron width to the outer edge of the side casing is the gold standard for creating a balanced and professional appearance. By measuring carefully and accounting for decorative elements like backbands, you can ensure your window trim looks intentional and precise.
Remember to account for wall irregularities and choose high-quality materials to prevent future gaps. With these steps, you will be well on your way to a high-end finish that enhances the character of your home. If you have further questions about your specific trim project, feel free to reach out to a local millwork supplier for advice on matching your existing profiles.